Washington Backcountry Discovery Route Trip Report
Hey guys! If you are new here welcome to my motorcycle trip reports. Basically, it’s a section where I briefly go over my day-by-day with lots of pictures as well as some additional info to get you on your adventure. This time I’m reporting on the Washington Backcountry Discovery Route. If you are looking for more specific tips on this route check out my WABDR Tips post.
Table of Contents
Quick Bullet Points on the WABDR
- Length in miles: 575 miles
- Best time of year: June through the beginning of October.
- Length in time: 4-6 days.
- Permits or Passes: Discover Pass
- On/Off Road: 30/70
- Difficulty: Intermediate-Advanced
- Click for Instagram Story Highlights
The Washington Backcountry Discovery Route: Section-By-Section
Section 1: Cascade Locks – Packwood
- Miles: 163
- Difficulty: 2
- Highlights: Bridge of the Gods, Good Beer, Walupt Lake, Guler Ice Caves, Views of Mt. Adams and Rainier
Day one was pretty easy I would say a 2 out of 10 difficulty rating. For the most part, it was nicely laid-out gravel with a few sections of chunk and shallow ruts. Sometimes it would be really nice paved and then all of a sudden it would surprise you with a few potholes or ruts but nothing worth noting beyond that.

Cascade Locks was an amazing starting point with views of the Bridge of the Gods. I came from Bend Oregon the day before so I camped at the KOA which was $37. There was another camp spot called Marine Park Campground however it did not have trees or other amenities and cost $31. So it just made sense to stay at the KOA because they had a pool, hot tub, and plenty of shade.

For dinner, I headed over to George’s Brewery. They had good tacos and beer. It’s a three-story facility super big so if you are traveling in a group no worries.

And then it began, you’ll be headed over the Bridge of the Gods which, I will say, nobbies on a steel bridge will make you pucker a bit. Then you’ll follow along the beautiful Colombia Gorge. If you are not familiar you are in for a treat. Huge cliffs towering over the Columbia River.
Guler Ice Caves, Takhlakh Lake, and Walupt Lake are on the itinerary today.

“Bridge of the Gods marks the beginning of your Washington Backcountry Discovery Route Adventure“
Although remember if you plan on stopping at these locations you will need a discover pass to park in the day-use areas.
First stop, Guler Ice Caves. A nice place to cool off however when I went there, there was hardly any ice. Perhaps due to that it was late August and it had been a particularly hot summer.

If you are feeling a little tired and taking the Wabdr a bit slow, Takhlakh Lake is an amazing place to enjoy the rest of the day. Amazing view of Mt.Adams over the lake and remote enough for you to enjoy the real peace and tranquility of the PNW.

Stopping at Walupt Lake also proved to be a highlight as seen below and also has camping.

In whole the route offers an abundance of scenic viewpoints along the way. Mount Adams, Mount Hood, tons of lakes, and tall green pine are the theme of the day as you reach the destination of Packwood where you will be met with views of yet another mountain, Mt. Rainier.

For highway, my tires were set at about 27 psi and once I hit gravel I turned them down to about 23 psi which I found to be a great mix for both road and off-road on my 90/90/21 and 130/80/17 Motoz Tractionator Desert H/T.

Once I arrived in Packwood I decided to camp out at La Wis Wis Campground. This area had dense pine forests with a river and plenty of shade with big flat campgrounds. There was also a blue pool swimming area to take a dip after a long hot day in all that gear.

If you decide to stay in La Wis Wis campground just know that loops D and E are along the river and the rest of the loops are interior.

The whole day I saw about 10 cars while off-road and only two motorcyclists. Today’s problems included the gas tank screw holes leaking gas all over my crotch area. Yeah, I left those pants outside overnight.
One thing I noticed is that there are a ton of campgrounds along the way so in essence you can just kind of wing it and whenever you get tired you can just stop at the next campground.
Section 2: Packwood-Ellensburg
- 122 miles
- Difficulty: 7
- Highlights: Rimrock Lake, Bethel Ridge, Clemens Mountain, and Baby Head Hill.
Today was the day that things went up a notch. You will definitely hit some ruts, hard chunks, and smooth loose rocks. The most difficult parts of the day will be Bethel Ridge, Clemens Mountain, and Baby Head Hill.

Bethel Ridge will be the first challenge after a nice big pavement section on Highway 12. Expect a nice incline with rock chunks. There is an alternative route along the highway but I recommend giving this a go as it is short and fairly easy for a rider that is familiar with some offroad riding.
The main highlight here that you don’t want to miss is riding along the cliff edge that opens up into an incredible panoramic view of Oak Creek Wildlife Area along with a view of Mt. Adams & Mt. Rainier.

Next up Clemens mountain expects the same but a little increase in difficulty to the top but nothing too challenging to note.
This stage is where you go from big Ponderosa pine/pine trees to Eastern Washington golden grass dispersed trees and rolling hills scenery.

The next highlight is riding through the dead forest between Burn Canyon and Hardy Canyon. Shortly after you’ll hit your first gate on this section. Make sure to open and shut it to keep the ranchers happy with us riding through their property.
After only a few miles on pavement, you will get back to the dirt through another gate and this is when things get interesting.

Get ready for a long, exposed, climb with a few false summits along the way until you ultimately get to the infamous Baby Head Hill. I remember thinking on a few false summits that I had accomplished the last hill however, this was far from the truth as each hill became longer and harder until finally reaching the actual summit. I would say that there are about three to four hill climbs. The terrain on the last hill was big rock chunks paired with loose scree. I did bog down and stall about 10 feet from the finish.
Unfortunately, I think I took the harder path as there was a split in the route. One left and one right. I went right and shortly after found some really big rocks that killed my momentum. Luckily I put my foot down and clasped my front brake to hold me in place but it was a struggle. I was drenched in sweat at this point. So I kicked the motorcycle back in first, gave it some clutch feathering, and after two attempts made it up the hill.

The rest of the ride from this point on was a bit of a struggle. Type 2 fun as Baby Hill took out all of my energy. Luckily the rest of the route was a slight uphill to then downhill easy dirt road with some loose rock but not much.
In the end, I made it to Ellensburg Washington and since I’d been camping for two days and needed to recharge all my batteries for my cameras and for myself lol, I decided to stay in downtown Ellensburg at the Windrow Hotel. Mind you the other hotels in the area are all along the freeway and you will have to drive downtown.

I would highly suggest Windrow Hotel if you want to be in the center of it all and enjoy the really nice downtown area without having to drive.
Around the corner from the hotel, I checked out The Tav, which had nice cheap eats and was kind of like an old wooden bar tavern.

On my way in I also stopped at a brewery called Iron Goat which had a small indoor tasting room, nice staff, and free popcorn! The Windrow Hotel also had a nice large bar where I ordered a well-made Sazerac to take up to their rooftop lounge where I enjoyed my beverage while watching the sunset.
Section 3: Ellensburg to Cashmere
- 77 miles
- Difficulty: 4
- Highlights: Lion Rock Viewpoint, Silt Section outside Wenatchee, Optional the Bavarian town of Leavenworth
So today was probably one of the most fun days. Why is that, perhaps because it precedes the horrors of yesterday?
Most of this day came with amazing views and nice soft grippy dirt so you can really throttle through the mountains.

You will begin by heading out of Ellensburg to find Reecer Creek Twisties which was a bit of fun as the name implies. Then you will head up to Lion Rock viewpoint. A short challenging detour but definitely worth it.
Today was the busiest day on the trail. I saw about eight riders ranging from dirt bikes to adventure riders so it’s important to remind ourselves to stay on our side of the trail.

Now for the highlight/ most challenging section of the day. The silt section outside of Wenatchee. Yes, just as you reach civilization you immediately leave it and power uphill in about a foot or two of silt. This stuff gets everywhere and will leave you huffing and puffing from the battle.

Not too long after you will arrive in Cashmere. Not the most happening town but a good place for food, fuel, and some rest if you are ready for it. However, if you’re feeling it, I’d highly recommend driving down and checking out Leavenworth. This little Bavarian-themed town is a great place to rest and relax, German style.
Section 4: Cashmere to Lake Chelan
- 104 miles
- Difficulty: 4
- Highlights: Views from Chumstick Mountain, Views of Lake Chelan, The Jungle, Steliko Lookout tower
You’ll start off with a nice long paved section before heading on the dirt to summit Chumstick Mountain. The views from here are amazing as you get to see a glimpse of The Enchantments which is a famous mountainous area in Washington.

Next up after passing Ardenvoir, you’ll take a slight detour to the Steliko Lookout Tower. This is a decommissioned lookout tower that was built in 1947 and used up until the 1990s. If you are tired by this point you can even reserve a night in the lookout tower itself. However, the best advice is to book well in advance.

Most of today is easy smooth dirt, that is until you reach “The Jungle”. This is a section with narrow lines, some chunks, and some sandlike terrain. But the views will be worth it and so will the beer afterward in Lake Chelan.

Right after the jungle, you’ll start seeing some man-made campsites that you can stay at. Then if you wanna go further down you can stay at the Snowberry campground which is a national park campground that is $24 a night and then if you go further down you get to a few state parks called 24 mile and Lake Chelan State Park. State parks range from $30 up to $50 for electricity.

When I came into town I forgot it was a Friday and summer tourist season, so both state parks were full and I had to backtrack up into the mountains to find a nice free dispersed campsite. So be mindful if you plan on coming in late to this area.
Section 5: Lake Chelan to Conconully
- 103 miles
- Difficulty: 2
- Highlights: Cooper Mountain, Arlington Mine, high desert to pine trees
Today will be another really fast easy dirt day. This route was mostly gravel only a few sections with some rocky chunk but the rest of it was really either smooth gravel or pavement riding.

First, you’ll head out of Lake Chelan and up to Cooper Mountain Summit. Some great views can be had and is a good place for a quick stretch of the legs because by section 5 you are feeling it.

There’s a nice mine called Arlington Mine you can check out also a few lakes on the way that you can stop and rest. Also, I highly recommend heading over to Winthrop which is a small detour toward the end of this section. It is a small western-themed town with one of the oldest legal saloon in Washington. Not a bad place for a well-earned beer.

You will eventually end up in Conconully. There is a Resort called Liar’s Cove with some tent sights right by the lake and where you can rent some kayaks if you still have the energy left to do some more adventuring.
Section 6: Conconully to the Canadian Border
- 66 miles
- Difficulty: 2
- Highlights: Palmer Lake, Skull and Crossbones Cabin, Canadian Boarder
The day starts ripping through the woods on easy unpaved forest roads. Then you will get up in elevation on Lone Frank Pass which provides some great views.
Then you’ll come across the Skull and Crossbones cabin. This is an old fire lookout log cabin from the 1930s.

As I came out of the mountains and start declining into the valley I was rewarded with Palmer Lake. A beautiful tranquil lake nestled between golden rolling hills. I was so impressed with the beauty of this lake that I definitely put it on my list of places to return.

Next, you will pass through an old mining ghost town called Nighthawk. When I went through it didn’t seem like much was left but what still stood was interesting to see.

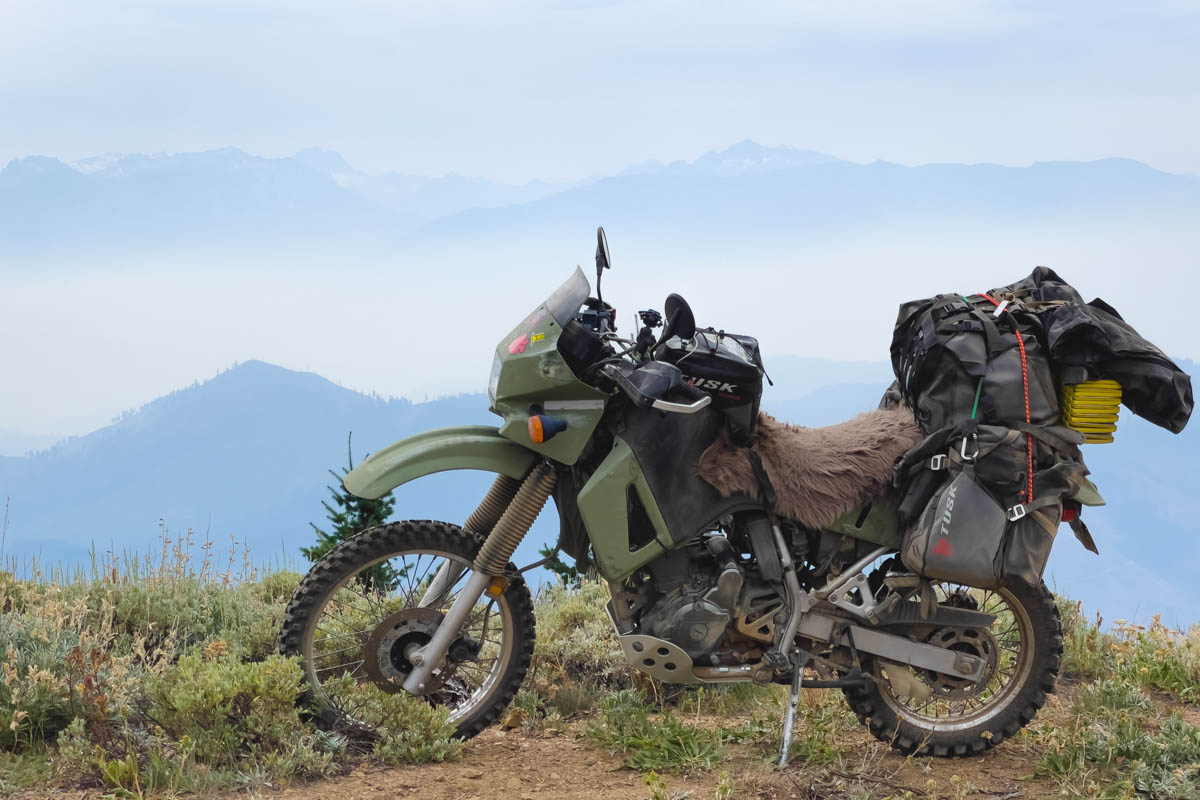
One thing that’s really cool is as you get closer to the border of Canada you’ll start seeing these massive mountains that jet out from the valleys. The awe inspired, I took my victory picture with the KLR and started heading back to Bend.
Thanks for reading and I hope you found some insightful info for your own Washington Backcountry Discovery Route Adventure!